
ge he sensor dry dryer manual
Ge He Sensor Dryer Manual: An Overview
This manual provides comprehensive guidance for operating and maintaining your GE HE sensor dryer, ensuring optimal performance and longevity.
It details safety precautions, installation procedures, cycle selections, troubleshooting steps, and essential maintenance tasks.
Understanding this guide will help you efficiently utilize your dryer’s features and address potential issues effectively.
From unpacking to warranty details, this resource covers all aspects of your appliance’s lifecycle.
Refer to this manual for a seamless and safe drying experience, maximizing the benefits of your GE HE dryer.
Proper use and care, as outlined herein, will contribute to years of reliable service.
Understanding the Ge He Sensor Dryer
The GE HE sensor dryer represents a significant advancement in laundry technology, moving beyond simple timed drying to intelligently monitor and adjust the drying process. Unlike traditional dryers that rely on a preset time, this model utilizes advanced moisture sensors to detect the dampness level of your clothes.
This sensor technology ensures clothes are dried to your desired level of dryness, preventing over-drying which can damage fabrics and waste energy. The dryer’s control system analyzes the moisture readings and automatically adjusts the heating and drying time accordingly. This results in more efficient operation, reduced energy consumption, and gentler care for your garments.
Furthermore, the GE HE sensor dryer often incorporates features like automatic wrinkle prevention, which periodically tumbles clothes even after the drying cycle is complete to minimize creases. Understanding these core functionalities is crucial for maximizing the dryer’s benefits and achieving optimal laundry results. The dryer’s intelligence lies in its ability to adapt to different load sizes and fabric types, providing a customized drying experience.
Key Features of Ge He Sensor Dryers
GE HE sensor dryers boast a range of innovative features designed for convenience and efficiency. Central to their operation is the advanced moisture sensing technology, which accurately detects when clothes are dry, preventing energy waste and fabric damage. Many models include a variety of pre-programmed cycles, tailored to specific fabric types like delicates, towels, and bulky items.
Steam refresh cycles are often available, offering a quick way to remove wrinkles and odors without a full wash. The dryers frequently feature durable stainless steel drums, ensuring long-lasting performance and resistance to rust. Smart features, such as Wi-Fi connectivity, allow for remote control and monitoring via a smartphone app.
Additional benefits include wrinkle shield options, which periodically tumble clothes after drying to minimize creases, and sanitize cycles for enhanced hygiene. These features combine to deliver a superior drying experience, offering both convenience and peace of mind.

Safety Precautions
Prioritize safety when installing and using your GE HE sensor dryer; always follow these guidelines to prevent fire, electric shock, and injury.
Read all instructions carefully before operation, ensuring a secure and reliable drying process.
Important Safety Instructions
To reduce the risk of fire, electric shock, or injury when using your GE HE sensor dryer, adhere to the following crucial safety instructions. Always disconnect the dryer from the electrical supply before cleaning or performing maintenance. Never operate the dryer if the power cord or plug is damaged. Do not use an extension cord; plug directly into a grounded outlet.
Inspect the venting system regularly to ensure it is free from obstructions. Do not dry items that have been soaked in flammable liquids, such as gasoline or cleaning solvents. Keep the area around the dryer clear of combustible materials. Supervise children when they are near the dryer.
Do not attempt to repair the dryer yourself; contact a qualified technician for repairs. Avoid overloading the dryer, as this can cause it to overheat. Ensure proper grounding to prevent electric shock. Failure to follow these instructions could result in serious consequences.
Grounding Requirements
Proper grounding is essential for the safe operation of your GE HE sensor dryer. This dryer must be grounded to minimize the risk of electric shock in the event of a malfunction. The dryer is equipped with a three-prong grounding plug; do not remove or alter this plug in any way.
Connect the dryer to a dedicated, properly grounded electrical outlet that meets local codes and regulations. Do not use adapter plugs or extension cords. If a two-prong outlet is the only available option, consult a qualified electrician to install a grounded outlet.
Ensure the grounding wire is securely connected to the dryer’s frame. Regularly inspect the grounding connection to verify its integrity. Improper grounding can create a hazardous situation and void the warranty. Always prioritize electrical safety when installing and using your dryer.
Installation Guide
Carefully unpack your GE HE sensor dryer and inspect for any shipping damage.
Follow these steps for proper placement, power connection, and venting to ensure safe operation.
A correct installation maximizes efficiency and prevents potential hazards.
Unpacking and Inspection
Upon delivery, carefully inspect the exterior of the shipping carton for any visible signs of damage; Note any dents, punctures, or tears on the delivery receipt before signing.
Once the dryer is inside your home, carefully remove all packing materials, including foam inserts, cardboard supports, and plastic wrap. Retain these materials until you’ve confirmed the dryer is functioning correctly.
Inspect the dryer itself for any cosmetic damage, such as scratches or dents. Check the door to ensure it opens and closes smoothly and that the seal is intact.
Verify that all included accessories are present, including the power cord, vent connector, and any documentation.
If any damage or missing parts are discovered, immediately contact the retailer or GE customer support. Do not attempt to operate a damaged dryer.
Proper inspection now prevents potential issues later.
Location Requirements
Select a location that is level, stable, and capable of supporting the dryer’s weight, especially when fully loaded with clothes. A concrete floor is ideal; if on a wooden floor, ensure adequate support beneath the dryer.
Ensure sufficient clearance around the dryer for proper ventilation and servicing. Allow at least 1 inch of space on each side and 4 inches behind the dryer.
The location must be dry and protected from the elements. Avoid areas with high humidity or potential water exposure.
Do not install the dryer in a garage or confined space without adequate ventilation, as this could pose a safety hazard.
The exhaust vent must terminate to the outside and should not be obstructed. Follow local building codes regarding vent length and termination.
Proximity to electrical and gas connections (if applicable) is crucial for convenient installation.

Connecting to Power and Venting
Before connecting, ensure the dryer’s voltage matches your household supply. A dedicated 240V circuit is typically required; consult a qualified electrician if unsure.
Plug the power cord securely into the outlet. Do not use extension cords or adapters.
Proper venting is critical for safe and efficient operation. Use rigid metal ductwork, minimizing bends and keeping the vent length as short as possible.
Securely connect the vent duct to the dryer and the exterior vent hood with clamps and duct tape, ensuring an airtight seal.
Avoid using plastic or foil venting, as these materials are fire hazards.
Regularly inspect the vent duct for obstructions like lint buildup, which can reduce airflow and increase drying time.
Gas dryers require a gas supply line connection performed by a qualified technician.
Operating Instructions
Familiarize yourself with the control panel and cycle options for optimal drying.
Properly load the dryer, avoiding overloading, and select the appropriate cycle.
Utilize the moisture sensor for efficient and automatic drying results.
Always follow the garment care label instructions for best results.
Control Panel Explained
The GE HE sensor dryer’s control panel is designed for intuitive operation. The digital display clearly shows the selected cycle, remaining time, and any active options. A rotary dial allows for easy cycle selection, ranging from delicate to bulky items. Dedicated buttons activate features like ‘Damp Dry’ or ‘More Dry’ to customize drying levels.
The ‘Sensor Dry’ option automatically detects moisture levels, stopping the cycle when clothes are dry, preventing over-drying and saving energy. A ‘Delay Start’ button allows you to schedule drying for a later time. Temperature settings, typically ‘High’, ‘Medium’, and ‘Low’, are adjustable based on fabric type.
Indicator lights signal cycle status – ‘Power’, ‘Heating’, ‘Cool Down’, and ‘End of Cycle’. A ‘Lint Filter’ reminder light illuminates when cleaning is needed. The ‘Wrinkle Shield’ option periodically tumbles clothes after the cycle ends to minimize wrinkles. Understanding each button and indicator ensures you can effectively control your dryer’s performance.
Cycle Selection Guide
The GE HE sensor dryer offers a variety of cycles to cater to different fabric types and drying needs. The ‘Normal’ cycle is ideal for everyday cottons and linens. ‘Delicates’ provides gentle heat for lingerie, silks, and other fragile items. ‘Permanent Press’ minimizes wrinkles in synthetic fabrics like polyester and nylon.
‘Bulky/Bedding’ is designed for larger items like comforters and blankets, utilizing extended drying times. ‘Quick Dry’ offers a fast cycle for small loads needing a quick refresh. ‘Steam Refresh’ utilizes steam to remove wrinkles and odors without full heat.
‘Sanitize’ employs high heat to eliminate bacteria and allergens. The ‘Towels’ cycle is optimized for drying thick towels efficiently. Always consult garment care labels before selecting a cycle. Utilizing the correct cycle ensures optimal drying performance and protects your clothes from damage.
Using the Moisture Sensor
The GE HE sensor dryer utilizes advanced moisture sensing technology to automatically adjust drying time. This prevents over-drying and conserves energy. The sensors, located inside the dryer drum, detect the moisture level of the load. The dryer will shut off when the selected dryness level is reached.
For optimal performance, ensure the lint filter is clean and the load is not overloaded. Overloading can impede airflow and affect sensor accuracy. Avoid using dryer sheets, as they can coat the sensors and reduce their effectiveness.
If you prefer a specific drying time, you can manually override the sensor and select a timed dry cycle. However, the sensor provides the most efficient and fabric-friendly drying experience. Regularly cleaning the sensor bars with a soft cloth ensures accurate moisture detection.
Troubleshooting Common Issues
This section offers solutions for typical problems, like the dryer failing to start or heat, or moisture sensor errors.
Diagnose and resolve issues quickly, ensuring your GE HE dryer operates efficiently and safely.
Follow the provided steps to restore optimal performance and avoid potential damage.
Dryer Not Starting
If your GE HE sensor dryer isn’t starting, first verify the power cord is securely plugged into a functioning outlet. Check your home’s circuit breaker or fuse box to ensure the dryer’s circuit hasn’t tripped or blown. A tripped breaker is a common cause;
Next, confirm the dryer door is completely latched. The dryer won’t operate if the door switch isn’t engaged. Try pressing firmly on the door to ensure it’s fully closed. Also, examine the control panel for any error codes displayed, as these can pinpoint the issue.
If the start/pause button isn’t responding, attempt to reset the dryer by unplugging it for a few minutes, then plugging it back in. If these steps don’t resolve the problem, there might be an issue with the motor, the door switch, or the control board, requiring professional service.
Do not attempt to repair these components yourself.
Dryer Not Heating
If your GE HE sensor dryer is running but not heating, the most common culprit is a faulty heating element. This component is responsible for generating the heat needed to dry clothes. Before assuming a failed element, check the lint filter – a clogged filter restricts airflow and can cause overheating protection to shut off the heating element.
Also, verify the vent is clear of obstructions. A blocked vent prevents proper exhaust and can trigger the safety switch. Inspect the thermal fuse and thermostat; these safety devices protect against overheating and may need replacement.
If these checks don’t reveal the issue, the heating element itself likely needs to be tested and potentially replaced by a qualified technician. Do not attempt to repair electrical components yourself due to the risk of electric shock.
Always disconnect power before inspecting any internal parts.
Moisture Sensor Malfunctions
If your GE HE sensor dryer isn’t accurately detecting moisture levels, clothes may remain damp or the dryer could run excessively long; This often indicates a problem with the moisture sensor bars located inside the dryer drum. These bars can become coated with fabric softener residue or lint, hindering their ability to sense moisture.
Regularly clean the sensor bars with rubbing alcohol and a soft cloth. Ensure they are completely dry before restarting the dryer. If cleaning doesn’t resolve the issue, the sensor bars themselves may be faulty and require replacement.
Occasionally, a malfunctioning control board can also cause inaccurate moisture readings. A technician can diagnose and address control board issues. Avoid overloading the dryer, as this can interfere with sensor accuracy.
Proper sensor function ensures efficient drying and prevents damage to clothes.

Maintenance and Care
Regular cleaning of the lint filter, drum, and annual inspections are crucial for optimal dryer performance and longevity.
Consistent care prevents malfunctions, ensures efficient operation, and extends the life of your GE HE sensor dryer.
Cleaning the Lint Filter
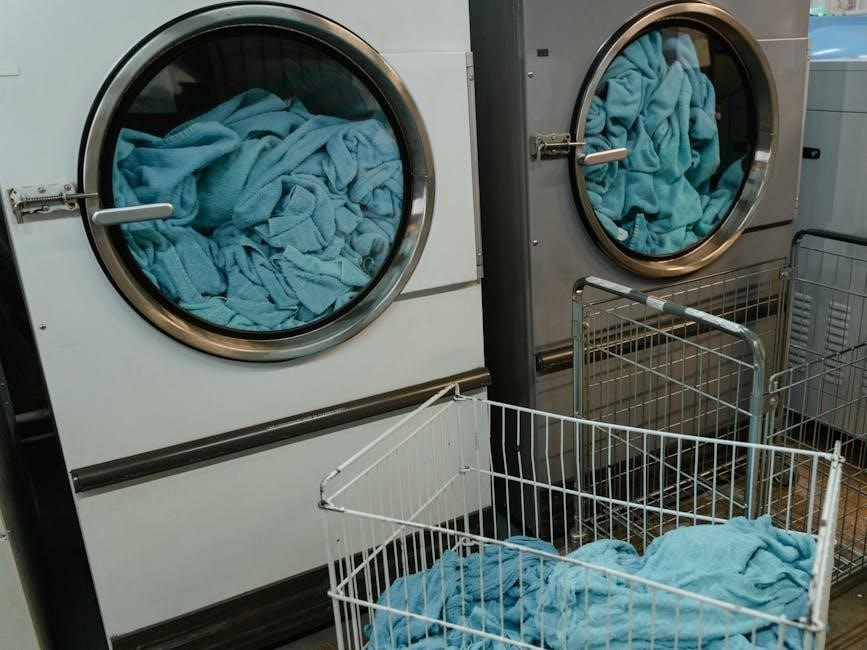
The lint filter is a critical component for maintaining your GE HE sensor dryer’s efficiency and safety; A clogged filter restricts airflow, leading to longer drying times, increased energy consumption, and potentially posing a fire hazard. It’s essential to clean the lint filter after every load.
To access the lint filter, locate it inside the dryer drum, usually near the door opening. Gently lift the filter upwards and remove it. Use your fingers or a soft brush to remove the accumulated lint. For stubborn lint buildup, you can rinse the filter with cool water and a mild detergent. Ensure the filter is completely dry before reinstalling it.
Periodically, you should perform a more thorough cleaning of the lint filter housing. Use a vacuum cleaner with a hose attachment to remove any lint that may have accumulated in the housing. A clean lint filter ensures optimal dryer performance and contributes to the longevity of your appliance. Ignoring this simple maintenance task can lead to costly repairs and safety concerns.
Cleaning the Dryer Drum
Regularly cleaning the dryer drum is vital for maintaining optimal performance and preventing unpleasant odors. Residue from fabric softeners, detergents, and transferred dyes can build up over time, impacting drying efficiency and potentially staining clothes. A simple cleaning routine can significantly extend the life of your GE HE sensor dryer.
To clean the drum, use a soft cloth dampened with warm water and a mild detergent. Avoid abrasive cleaners, as they can damage the drum’s surface. Wipe down the entire interior, paying attention to areas where residue is visible. For stubborn stains, create a paste of baking soda and water, apply it to the stain, and let it sit for a few minutes before wiping clean.
After cleaning, wipe the drum with a clean, damp cloth to remove any remaining detergent residue; Leave the dryer door open to allow the drum to air dry completely before using it. This prevents moisture buildup and ensures a fresh, clean drying environment.
Annual Maintenance Checklist
To ensure your GE HE sensor dryer continues to operate safely and efficiently, perform this annual maintenance checklist. First, thoroughly inspect the vent hose for kinks, blockages, or damage, replacing it if necessary – a crucial fire prevention step. Next, vacuum the area around the dryer to remove accumulated lint and dust.
Check and tighten all gas connections (if applicable) and electrical connections. Inspect the dryer’s cabinet for any signs of damage or corrosion. Clean the exterior of the dryer with a damp cloth and mild detergent. Don’t forget to examine the door seal for wear and tear, replacing it if it’s compromised.
Finally, run an empty dryer cycle on the highest heat setting to burn off any remaining lint. This proactive approach will help maintain peak performance and extend the lifespan of your appliance. Documenting these checks ensures consistent upkeep.

Parts and Replacement
Locating and replacing dryer components is essential for maintaining functionality. Genuine GE HE parts ensure compatibility and optimal performance.
This section details identifying parts and ordering replacements, guaranteeing a seamless repair process and continued dryer operation.
Identifying Dryer Parts
Successfully repairing your GE HE sensor dryer begins with accurately identifying the necessary replacement parts. The dryer consists of numerous components, each playing a crucial role in its operation. Common parts requiring replacement include the heating element, thermal fuse, thermostat, drive belt, drum rollers, and the moisture sensor itself – a key feature of your model.
Refer to your dryer’s model number, typically found on a label inside the door or on the back panel, when searching for parts. This ensures you order the correct component designed specifically for your appliance. Diagrams and parts lists are often available online through the GE Appliances website or authorized parts retailers.
Visual inspection can also aid in identification. Carefully examine the damaged part, noting its shape, size, and any identifying markings. When in doubt, consult a qualified appliance repair technician for assistance. Incorrect parts can lead to further damage or safety hazards.
Always disconnect power before attempting any disassembly or part identification.
Ordering Replacement Parts
Once you’ve identified the necessary part for your GE HE sensor dryer, several avenues exist for ordering replacements. The official GE Appliances website (geappliances.com) offers a comprehensive parts store, allowing you to search by model number for guaranteed compatibility. Authorized GE parts distributors, both online and brick-and-mortar stores, are also reliable sources.
When ordering, always double-check the part number to ensure accuracy. Providing your dryer’s model number is crucial for preventing errors. Compare prices across different retailers to find the best deal, but prioritize reputable sellers to avoid counterfeit or substandard parts.
Consider shipping costs and return policies before finalizing your purchase. Some retailers offer free shipping on orders over a certain amount, while others have lenient return policies if the part doesn’t fit or is defective. Keep your order confirmation and receipt for warranty purposes.

Warranty Information
Your GE HE sensor dryer is covered by a limited warranty, protecting against defects in materials and workmanship. The standard warranty typically lasts for one year from the date of original purchase, covering parts and labor for repairs. Extended warranties are often available for purchase, providing additional coverage for a longer period.
To make a warranty claim, you must provide proof of purchase, such as a sales receipt or delivery confirmation. Contact GE Appliances customer service through their website (geappliances.com) or by phone to initiate the claim process. Warranty coverage may be voided if the dryer is misused, improperly installed, or modified.
The warranty does not cover cosmetic damage, normal wear and tear, or damage caused by external factors. Carefully review the full warranty document included with your dryer for complete details and exclusions. Registering your appliance online can streamline the warranty claim process.