
heat n glo wall switch instructions
Heat & Glo Wall Switch Instructions: A Comprehensive Guide
Today’s date is December 19, 2025, at 5:08 PM (12/19/2025 17:08:00). This guide provides essential information regarding Heat & Glo wall switch operation, troubleshooting, and safety.
Understanding heat flux (rate of energy transfer) and heat flow is crucial for efficient system performance. Latent heat settings impact overall efficiency, while proper wall switch wiring ensures safe operation.
Understanding Your Heat & Glo System
Heat & Glo fireplaces represent sophisticated heating solutions, often incorporating gas-fueled flames and advanced control systems. These systems aren’t simply fireplaces; they are engineered for both aesthetic appeal and efficient zonal heating. A core component of this efficiency lies in understanding the interplay between heat flux – the rate of energy transfer per unit area – and heat flow, the total amount of heat transferred.
Your Heat & Glo system likely utilizes a wall switch to manage operation, potentially integrated with a remote control. The wall switch doesn’t just turn the fireplace on and off; it governs flame height, heat output, and potentially, latent heat settings related to the system’s overall thermal performance.
Proper operation requires awareness of how the system handles phase changes (like gas to flame) and the associated latent heat. Incorrect settings can lead to errors, such as the “latent heat cannot be less than zero” error reported in Fluent simulations, indicating a material property misconfiguration. Understanding these nuances ensures optimal performance and longevity of your Heat & Glo fireplace.
Furthermore, recognizing the system’s compatibility with remote controls and troubleshooting common issues, like unresponsive switches, are vital aspects of ownership.
Wall Switch Types & Compatibility
Heat & Glo fireplaces utilize various wall switch types, ranging from basic on/off switches to more sophisticated models with adjustable flame height and heat output controls. Compatibility isn’t always universal; older systems may require specific switch models, while newer units often support a broader range of options. Identifying your fireplace model is the first step in determining compatible switches.
Generally, switches fall into two categories: standard and programmable. Standard switches offer limited functionality, while programmable switches allow for customized settings and remote control integration. Remote control compatibility is a key consideration, as some switches are designed to pair seamlessly with Heat & Glo remotes.
When selecting a replacement switch, verify voltage and amperage ratings to ensure they match your fireplace’s requirements. Incorrect ratings can lead to malfunction or safety hazards. Furthermore, consider the wiring configuration; some switches require specific wiring diagrams for proper installation.
Understanding the interplay between heat flux and heat flow, as well as latent heat settings, doesn’t directly impact switch type but influences the control the switch provides over these system parameters. Always consult the Heat & Glo owner’s manual for specific compatibility information.
Basic Wall Switch Operation
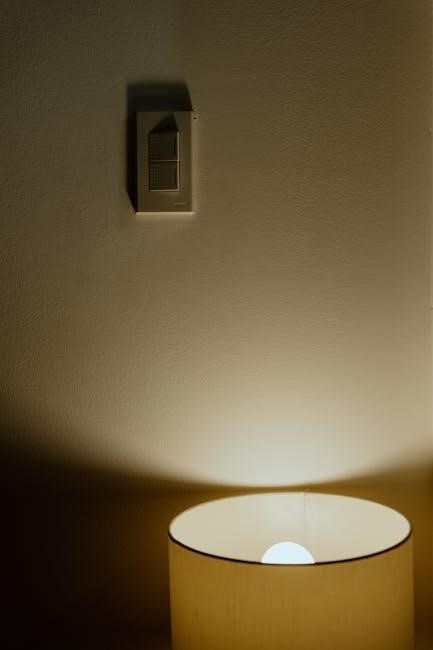
Most Heat & Glo wall switches feature a straightforward operational layout. A primary power button typically controls the fireplace’s on/off state. Depending on the model, additional buttons or a dial may adjust flame height and heat output. Familiarize yourself with the specific controls on your switch before operation.
Initial operation usually involves a simple press of the power button. Some switches require a brief hold to activate. Once on, observe the fireplace for proper ignition. If the fireplace doesn’t ignite, consult the troubleshooting section of this guide. Adjusting flame height is often achieved via dedicated buttons or a rotary dial, allowing you to customize the visual ambiance.
Heat output control, if available, may be linked to flame height or operate independently. Understanding the relationship between heat flux and heat flow is helpful when adjusting heat settings; higher flame height generally equates to increased heat output. Remember that latent heat settings, while not directly controlled by the switch, influence overall efficiency.

Always ensure the switch is easily accessible and free from obstructions. Regular inspection of the switch for damage or wear is recommended for safe and reliable operation.
Powering On/Off Your Fireplace
The primary function of your Heat & Glo wall switch is to control the fireplace’s power state. Typically, a clearly marked “Power” button initiates the start-up sequence. A single press usually activates the fireplace, initiating ignition. Some models may require a slightly longer press or hold to prevent accidental activation.
Upon pressing the power button, listen for the internal fan and ignition system to engage. Observe the fireplace to confirm proper flame ignition. If ignition doesn’t occur within a reasonable timeframe, refer to the “Troubleshooting” section for guidance. To power off, simply press the “Power” button again. The flame should extinguish, and the fan will typically run for a brief cool-down period.
Ensure the wall switch is readily accessible for convenient operation. Avoid placing objects near the switch that could obstruct access or potentially damage it. Understanding the relationship between heat flux and heat flow is important, as powering on initiates this energy transfer. Remember that latent heat settings, while not directly controlled here, affect overall heating efficiency.
Always allow the fireplace to fully cool down before performing any maintenance or adjustments.
Adjusting Flame Height
Your Heat & Glo wall switch often features controls for adjusting the flame height, allowing you to customize the visual ambiance and heat output. Look for dedicated “Flame Height” buttons, typically indicated with up and down arrows, or a dial control. Incremental adjustments are common; each press or turn modifies the flame’s intensity.
Observe the flame as you make adjustments to gauge the effect. Start with a lower setting and gradually increase it until you achieve your desired aesthetic. Be mindful that higher flame settings generally produce more heat. Understanding the interplay between flame height, heat flux, and overall heat flow is key to comfortable operation.
Some advanced models may offer preset flame height levels for convenience. Experiment with these presets to find your preferred settings. Avoid setting the flame height to maximum continuously, as this can potentially reduce the lifespan of certain components. Latent heat settings, while separate, contribute to the overall heating experience;
If the flame height adjustment seems unresponsive, consult the “Troubleshooting” section for potential solutions.
Controlling Heat Output
Heat & Glo wall switches provide various methods for controlling the heat output of your fireplace, ensuring comfort and energy efficiency. Beyond flame height adjustment, many models incorporate dedicated “Heat” or “Temperature” controls. These may be buttons, dials, or touch-sensitive interfaces.
Understanding the relationship between heat flux and heat flow is vital. Heat flux represents the rate of energy transfer, while heat flow is the total amount of energy transferred. Adjusting the wall switch influences both. Some systems offer multiple heat output levels – low, medium, and high – providing granular control.
Consider utilizing the thermostat function, if equipped. This allows you to set a desired room temperature, and the fireplace will automatically modulate its heat output to maintain that level. Latent heat settings, related to phase changes in materials, indirectly affect overall system efficiency.

Experiment with different settings to find the optimal balance between comfort and energy savings. Remember that external factors, such as room insulation and drafts, can impact perceived heat output.
Understanding Remote Control Integration
Many Heat & Glo fireplaces are designed for seamless integration with remote controls, offering enhanced convenience and control over your fireplace experience. These remotes typically mirror the functionality of the wall switch, allowing you to power the fireplace on/off, adjust flame height, and control heat output from a distance.
Remote controls often feature additional functions, such as programmable timers and adjustable fan speeds. Understanding the specific features of your remote is key to maximizing its benefits. The remote communicates with the fireplace via radio frequency (RF) or infrared (IR) signals, requiring a clear line of sight in some cases.
Successful integration relies on proper pairing between the remote and the wall switch receiver. This process, detailed in the “Pairing a Remote to Your Wall Switch” section, establishes a secure communication link. Ensure the remote’s batteries are fresh for optimal performance.
Troubleshooting remote control issues often involves checking battery levels, re-pairing the remote, and ensuring there are no obstructions interfering with the signal.
Pairing a Remote to Your Wall Switch
Establishing a connection between your Heat & Glo remote control and wall switch is crucial for seamless operation. The pairing process varies slightly depending on the specific model, but generally involves accessing a “pairing mode” on both the remote and the wall switch receiver.
Typically, this is initiated by pressing and holding a specific button combination on the remote – often the “learn” or “pair” button – while simultaneously performing a similar action on the wall switch, such as pressing and holding the power button for a designated duration. The wall switch may display a visual cue, like a flashing light, indicating it’s in pairing mode.
Once both devices are in pairing mode, they should automatically recognize each other and establish a connection. A successful pairing is usually confirmed by a change in the wall switch’s display or a signal from the remote. If pairing fails, repeat the process, ensuring both devices are within close proximity.
Consult your Heat & Glo owner’s manual for detailed, model-specific pairing instructions. A stable connection ensures reliable remote control functionality.
Troubleshooting Common Wall Switch Issues
Encountering issues with your Heat & Glo wall switch can disrupt fireplace operation. A common problem is the switch not responding, often due to depleted batteries. Replacing them is the first troubleshooting step. If the issue persists, check the circuit breaker to ensure power is reaching the switch.
Flame issues, such as inconsistent or absent flames, can sometimes be linked to a faulty wall switch connection. Verify all wiring connections are secure, both at the switch and within the fireplace unit. Error codes displayed on the wall switch provide valuable diagnostic information; consult your owner’s manual to decipher their meaning.
If the switch displays an error related to latent heat, it may indicate a sensor malfunction or an issue with the fireplace’s heating system. Always prioritize safety; if you’re uncomfortable working with electrical components, contact a qualified technician. Remember heat flux and flow are critical for proper function.
Regularly inspect the switch for physical damage and ensure it’s clean and dry.
Wall Switch Not Responding
A non-responsive Heat & Glo wall switch is a frequent concern. The most common cause is depleted batteries. Begin by replacing the batteries with fresh ones, ensuring correct polarity. If the switch remains unresponsive, investigate the circuit breaker supplying power to the fireplace. A tripped breaker will immediately halt operation.
Next, carefully examine the wiring connections at both the wall switch and within the fireplace’s control compartment. Loose or corroded connections can interrupt the signal. Ensure all wires are securely fastened. Consider the impact of latent heat settings on system performance; an unusual setting might contribute to unexpected behavior.
If the problem persists, test the switch with a multimeter to verify it’s receiving power. If power is present but the switch still doesn’t function, the switch itself may be defective and require replacement. Remember to disconnect power before handling any wiring. Understanding heat flux is important for diagnostics.
Consult your Heat & Glo owner’s manual for specific troubleshooting steps related to your model.
Flame Issues & Wall Switch Connection
Unusual flame behavior often indicates a connection issue between the wall switch and the fireplace’s ignition system. A flickering or weak flame can stem from a loose wire at the switch, within the fireplace, or at the gas valve. Inspect all connections, ensuring they are secure and free from corrosion.
If the flame is consistently low, even with the wall switch set to maximum, the gas supply should be checked. A partially closed gas valve or a regulator issue could restrict gas flow. However, always rule out electrical problems first. Consider the impact of latent heat settings; improper settings can sometimes affect flame characteristics.
A complete lack of flame, despite the wall switch being on, suggests a more significant problem. Verify the switch is sending a signal using a multimeter. If a signal is present, the issue likely lies within the fireplace’s control module or ignition system. Understanding heat flux is vital for proper operation.
Remember to disconnect power before inspecting any electrical components. Consult your Heat & Glo manual for model-specific troubleshooting guidance.
Error Codes Displayed on the Wall Switch
Heat & Glo wall switches utilize error codes to diagnose system malfunctions. These codes, displayed on the switch’s screen, provide valuable clues for troubleshooting. Refer to your specific model’s manual for a comprehensive list and explanation of each code.
Common error codes often relate to flame sensor issues, gas valve problems, or communication failures between the switch and the fireplace control board. A “low flame signal” error suggests the flame sensor isn’t detecting a stable flame, potentially due to a dirty sensor or a weak ignition.
Codes indicating a gas valve fault require immediate attention; do not attempt to repair the gas valve yourself. Contact a qualified technician. Communication errors may necessitate resetting the system or re-pairing the wall switch with the fireplace. Understanding heat flux and latent heat settings won’t resolve error codes, but a stable system is essential.
Document the error code before attempting any repairs. Some codes may require professional diagnosis and repair. Always prioritize safety and consult the manual before proceeding.
Replacing Batteries in the Wall Switch
Maintaining fresh batteries in your Heat & Glo wall switch is crucial for reliable operation. A low battery can cause intermittent issues, unresponsive controls, or inaccurate readings. Most switches utilize standard AA or AAA batteries – check your model’s manual for the correct type.
To replace the batteries, locate the battery compartment, typically on the back or side of the switch. Gently slide or pop open the compartment cover. Remove the old batteries, noting the correct polarity (+ and -). Insert the new batteries, ensuring proper alignment.
Close the battery compartment securely. After replacing the batteries, you may need to re-pair the switch with the fireplace control board, depending on the model. Refer to the “Pairing a Remote to Your Wall Switch” section for instructions.
Regular battery replacement – at least once a year, or when the switch displays a low battery indicator – prevents unexpected interruptions. Understanding heat flux won’t help with battery replacement, but a functioning switch is vital for system control.
Wall Switch Wiring Diagrams
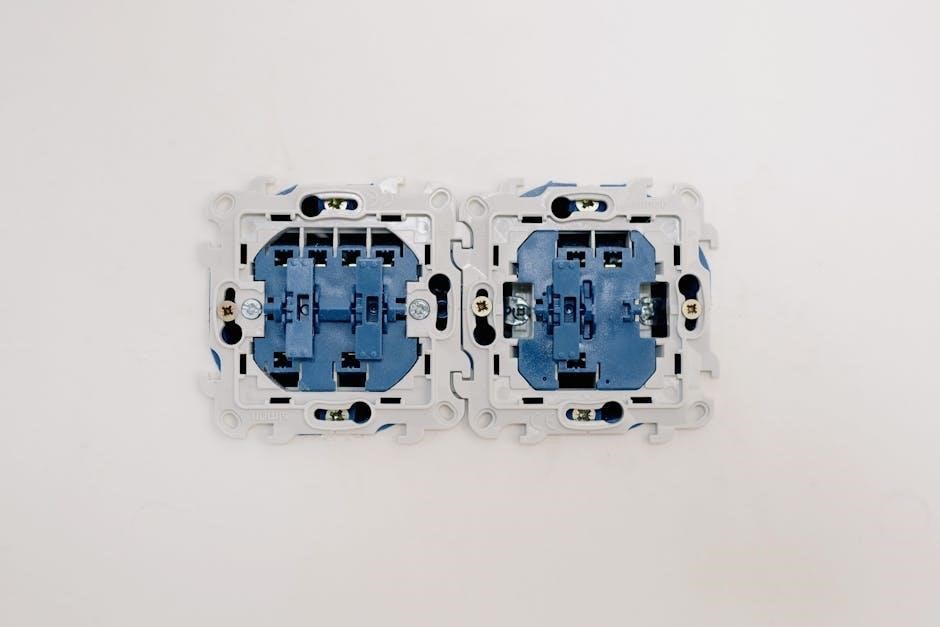
Understanding the wiring of your Heat & Glo wall switch is essential for safe installation and troubleshooting. Incorrect wiring can damage the fireplace system or create a fire hazard. Always disconnect power to the fireplace at the circuit breaker before working with any wiring.
Wiring diagrams vary depending on the Heat & Glo model and switch type. Common configurations include three-wire systems (live, neutral, ground) and four-wire systems (adding a communication wire). The communication wire enables advanced features like remote control operation and feedback to the control board.
Typically, the live wire connects to the switch’s power input, the neutral wire to the neutral bus, and the ground wire to the grounding screw. The switch output connects to the fireplace control board. Refer to your specific Heat & Glo model’s wiring diagram, found in the owner’s manual or on the manufacturer’s website.
If you are uncomfortable working with electrical wiring, consult a qualified HVAC technician. Improper wiring can negate latent heat settings and compromise system safety. Remember, heat flux calculations are irrelevant if the switch isn’t correctly wired!
Safety Precautions When Working with the Wall Switch
Prioritizing safety is paramount when working with your Heat & Glo wall switch. Electrical components pose significant risks, and improper handling can lead to injury or damage. Always disconnect the power supply at the circuit breaker before commencing any work on the switch or its wiring. Double-check that the power is off using a non-contact voltage tester.
Never attempt repairs or modifications if you lack the necessary electrical expertise. Consult a qualified HVAC technician for complex issues. Avoid working in damp or wet conditions, as water and electricity are a dangerous combination. Wear appropriate personal protective equipment, including insulated gloves and safety glasses.
Inspect the wiring for any signs of damage, such as frayed insulation or loose connections. Replace damaged wires immediately. Be mindful of heat flux and potential hot surfaces near the fireplace. Ensure the area is well-ventilated. Remember, understanding latent heat is secondary to electrical safety!
Treat all wires as live until proven otherwise. Following these precautions will help ensure a safe and successful experience when maintaining your Heat & Glo fireplace system.
Heat Flux and Heat Flow Considerations
Understanding heat flux and heat flow is fundamental to optimizing your Heat & Glo fireplace’s performance. Heat flux, defined as the rate of energy transfer per unit area, dictates how quickly heat radiates from the fireplace. Higher heat flux translates to more intense warmth, but also potentially increased surface temperatures.
Heat flow, conversely, represents the total amount of heat energy transferred. Factors influencing both include the wall switch settings, flame height, and the fireplace’s overall design. Efficient heat distribution relies on a balanced interplay between these two concepts. Proper ventilation is crucial to manage heat flow and prevent overheating.
Consider latent heat – the energy absorbed or released during a phase change (like melting or vaporization) – as it impacts the overall thermal efficiency of the system. A well-maintained fireplace maximizes heat transfer while minimizing energy loss. Understanding these principles allows for informed adjustments to your wall switch settings.
Optimizing these factors ensures comfortable warmth and efficient energy usage. Remember, a properly functioning wall switch is key to controlling these vital heat dynamics.
Understanding Latent Heat Settings (Related to System Efficiency)
Latent heat plays a significant, though often overlooked, role in the efficiency of your Heat & Glo fireplace system. It refers to the energy absorbed or released during a phase change – specifically, when a fuel source transitions between solid, liquid, or gaseous states. In the context of gas fireplaces, this primarily relates to the vaporization of fuel before combustion.

While your wall switch doesn’t directly control “latent heat settings” as a user-adjustable feature, the system’s design inherently accounts for it. Efficient combustion relies on providing sufficient energy for complete fuel vaporization. Incomplete vaporization reduces heat output and increases emissions.
Fluent simulations, used in the design of these systems, carefully model latent heat transfer to optimize burner performance. Errors like “latent heat cannot be less than zero” in Fluent indicate incorrect material property definitions, highlighting the importance of precise engineering.
A well-maintained system ensures optimal latent heat utilization. Regular servicing and proper ventilation contribute to efficient fuel vaporization and maximized heat output. Understanding this principle helps appreciate the system’s complexity and the importance of professional maintenance.
Setting Imprint Quality (Ark Survival Evolution ⏤ unrelated, but mentioned in search results)
Please note: The following information pertains to the video game Ark: Survival Evolved and is entirely unrelated to Heat & Glo wall switch instructions. It is included solely because the search results contained this topic.
In Ark: Survival Evolved, “imprint quality” refers to the effectiveness of raising a creature’s stats through caretaking. Higher imprint quality yields significant stat bonuses to the creature as it matures, making it a powerful asset. Setting imprint quality to maximum is often desired by players.
The command “SetImprintQuality 1” directly sets a creature’s imprint quality to 100%, effectively maximizing its potential. This bypasses the normal imprinting process, which requires consistent interaction with the baby creature – feeding, cuddling, and walking with it.
Using this command is considered by some to be an exploit, as it removes the challenge and time investment associated with proper imprinting. However, it’s a common practice among players seeking to quickly obtain high-stat creatures. Remember that using commands may have consequences depending on server rules.
Again, this information is irrelevant to Heat & Glo fireplaces and wall switch operation. It is presented only due to its presence in the initial search results.
Air Conditioning Mode Meanings (Cool, Dry, Fan, Heat ⏤ unrelated, but mentioned in search results)
Air conditioning remote controls commonly feature four primary modes: Cool, Dry (or Dehumidify), Fan, and Heat. Understanding each mode is essential for optimal comfort and energy efficiency;
Cool mode activates the compressor to lower the room temperature by removing heat. Dry mode reduces humidity without significantly lowering the temperature, ideal for damp environments. Fan mode simply circulates air, providing ventilation without cooling or heating. Finally, Heat mode utilizes the air conditioner’s heat pump to warm the room.
The remote control acts as the interface for selecting these modes. Extended information details the remote as a device for controlling the AC unit. These modes are distinct from the operation of a fireplace and its associated wall switch.
It is crucial to reiterate that this information is unrelated to Heat & Glo fireplaces and their wall switch controls. It is presented solely due to its appearance in the original search results.
Ammunition Types (AP, APCR, HE, HEAT ౼ unrelated, but mentioned in search results)

Four common types of tank and artillery ammunition are AP (Armor-Piercing), APCR (Armor-Piercing Composite Rigid), HE (High-Explosive), and HEAT (High-Explosive Anti-Tank). Each type is designed for different targets and employs a distinct method of penetration or destruction.
AP rounds utilize a hardened core to penetrate armor through kinetic energy. APCR rounds feature a tungsten core for increased penetration velocity. HE rounds detonate upon impact, relying on the blast and fragmentation to inflict damage. HEAT rounds employ a shaped charge to create a focused jet of molten metal capable of penetrating even thick armor.
HEAT rounds generally offer superior penetration against heavily armored targets compared to APCR and AP, while HE rounds are effective against softer targets. These are complex systems with no relevance to the operation of a Heat & Glo fireplace.
Again, this information is completely unrelated to Heat & Glo fireplaces and their wall switch controls. It is presented only because it appeared in the initial search results.